Monday, July 6, 2009

Syracuse dress - basted together

My Syracuse dress is now almost sewn together. Most of the seams are finished except I have only basted the bodice to the skirt (which is why it isn't sitting flat). The reason I have left that seam un-done is that I'm thinking about completely re-doing the bodice and wanted some second, third and fourth opinions.

You see, there are two problems, first I didn't leave enough space for a border between the seam allowance and the start of my embroidery, which means the embroidery is right hard up against the edge of the dress. And second, the embroidery is not as symmetrical as it could be. Close up it is pretty obvious. On the one hand, I'm not too keen on re-doing it. That said, enough time has gone into this dress, that the few extra hours to re-do it will be worth it to me if you think it looks funny.
The final remaining option is that I re-do the bodice but completely skip the embroidery. What do you think? PLEASE BE BRUTALLY HONEST!!!


Sunday, May 24, 2009

Syracuse dress - final muslin

This is really the final draft of my dress for Syracuse.
Matt helped me adjust the waist to fit nicely and I'm pretty
happy with the way it fits. it's so hard to do it on myself,
so having a hand was a huge help.

The two-tone colour is because I was running out of
the basic muslin fabric and had to use some other leftovers
I had around.

The sleeves are the only bit that need work - I don't
want them to be puffy, but I think I know how to fix
that.

Let me know if you notice anything else I should alter,
I just did the layout for the real fabric and am ready to
cut!

Thursday, May 14, 2009

Another round of muslins.... hopefully the last

I know it's just about time to stop fiddling and get down to the real sewing. But before I do I wanted to try on my final muslins one more time and dance about the house to see that they fitted well and wouldn't fall off. I found out that the shoulders do actually come off pretty easily. So... I've since been working on two solutions --- first is to alter the lines so that they come up a bit higher and second to build some internal structure to help hold them on (a waist stay and bands reaching up the shoulders... think suspenders but iside the dress).

First let me show you the final muslin pictures.

1) Vogue (for Sydney)


2) McCall's (for Syracuse)


Now... here is my revised version of the McCall's dress.
I copied a smaller size AND added 2cm to the shoulders.
I think I over-did the shoulder-reshape and made new problems.
So, before I go back to the old one and call it a day, I'm going to
try cutting it back to the designed lines -- but in the smaller size
and see what happens.

Excuse the tiny skirt - I cut it short to save time and fabric.
The short skirt makes it looks a bit like a skating outfit :-)


Thursday, April 23, 2009

McCall's 9126 and decisions!

I decided to make one more test dress, this one was based on a McCall's pattern (9126).
I made a muslin of the view shown in the top left. Here is a video of me in the dress.


I'm pretty happy with this dress. It fitted without any changes
to the pattern and I think I really like the back detail. It makes
the whole thing a little less conservative without being too immodest.
The only change I'm thinking about is to take the skirt in so that
it is less full and not wear a petticoat.

I have decided this will almost certainly be the dress I make for
Syracuse and I have the fabric picked and washed too!
Appropriately it is fabric I bought in Syracuse last December
from a wonderful little store downtown that had just opened.

Here is a photo of the fabric (right) and the lining (a super soft cotton)
drying across our entire living room.


And catching the light nicely :-)


I'm also toying with the idea of making the very same pattern for my Sydney
dress, just using different fabric and perhaps keeping the skirt full.

My only other news is that I finally decided not to make the bridesmaid
dresses, it's just one too many things for me to get done and was adding
to my stress levels. I was sad to admit defeat, but I'll come back to making
those dresses for Jane, Em and Rebecca after the wedding.

However, I do still plan to make a little dress for Madeline
(who will be 9 months by September!) to match the dress Jane is
wearing.

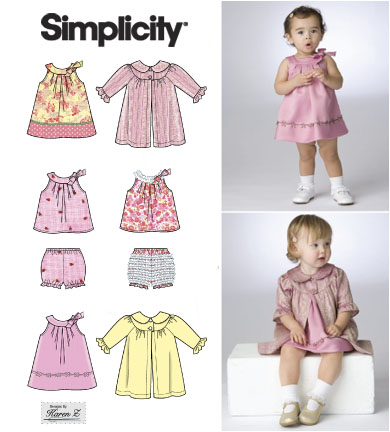
The pattern I am planning to use for Madeline's dress is Simplicity 2668.
I will make both the dress in the top left and the coat. Though I'm not
too sure about the bow.


Comments welcome!

Tuesday, March 17, 2009

Bridesmaid dress V1.0 - Butterick

I decided it was worth a try to make the birdesmaid dresses. Hey, if I'm going to sew my wedding dress, how hard can it be to sew a few more? Yes I know, you're all telling me I'm crazy - and I'm ready to accept defeat if the muslins don't work. But I think this is worth I try.

After some discussion, we decided to start with a Butterick pattern that is remarkably similar to a J.Crew dress.


I quickly sewed up a muslin in a size 10 for Emily to try. Note that the fabric I am using for the mock-up is very thin (the real thing will be much better quality) and I adjusted the seam allowances in the bodice so that it will be easy to alter the fit. That's why the mid-section has extra fabric that you can see protruding half way down on the inside of the dress. The final version will be fully lined, so no need to worry about that sort of thing.

Here I am modelling it (thank you Matt for taking the pictures!! Not that he is allowed to read this blog...):


So far I'm hopeful!
First fitting tomorrow.
Stay tuned!

Sunday, February 15, 2009

Vogue 2788 - Version 2.0

After lots of measuring and drawing and calculating and re-measuring and re-drawing I finally finished altering the pattern pieces for the bodice of Vogue 2788. The main changes I made were to narrow the shoulders and raise the back neckline. Here are some pictures of the bodice attached to the old skirt, modeled by my dressform.

Having tried the dress of myself, I noticed that the dressform is a bit bigger than me, which makes sense since we wrapped the duct tape over the top of me. Though, I didn't expect it to make such a noticeable difference. Nonetheless, it is close enough in size to be very helpful for fitting.


Sunday, January 25, 2009

Duct tape dressform

Matt helped me build my very own dressform out of duct tape! I had seen tutorials online (e.g. threads) and decided to give it a try. Here are some pictures of the process.


To mount the dressform, I bought some lumber and Matt built a stand. I think he did an amazingly professional job.


Vogue 2788 - Version 1.1

I finally got around to adding the zipper ot Vogue 2788 and trying it on with a petticoat underneath and realised that it was rather wide in the waist and hips which gave it that slight maternity-dress look. So, I took in the side-seams 2cm on each side. Below is a video showing the result. I think the skirt could be even a little less full, especially around the hips - so might work on that a little more.

The main area that needs a lot of work on this dress is the bodice at the neck and back. The shoulders are too wide (you can see one side a dart has been basted to take away some of the width) and the back too wide. I'm also not sure about having the back so low - my shoulder blades look ridiculous! Plus it'll be cold.

Note that because the petticoat starts well below the end of the bodice, you can see a colour contrast where there is no lining and no petticoat. Next version will have an integrated lining/petticoat to solve that problem.

Simplcity 5440


I finally finished and photographed Simplicity 5440, thanks to Jonathan who is visiting this weekend on his way home to Sydney.

I'm not sure I like the shape - it seems a bit too 80s. The puffy sleeve is certainly not me (though that is relatively easy to fix). However, in general, I don't know about the long bodice.

The one thing that is great is the shoulder/neck line. I might use this to adapt the Vogue pattern to fit my shoulders better.